
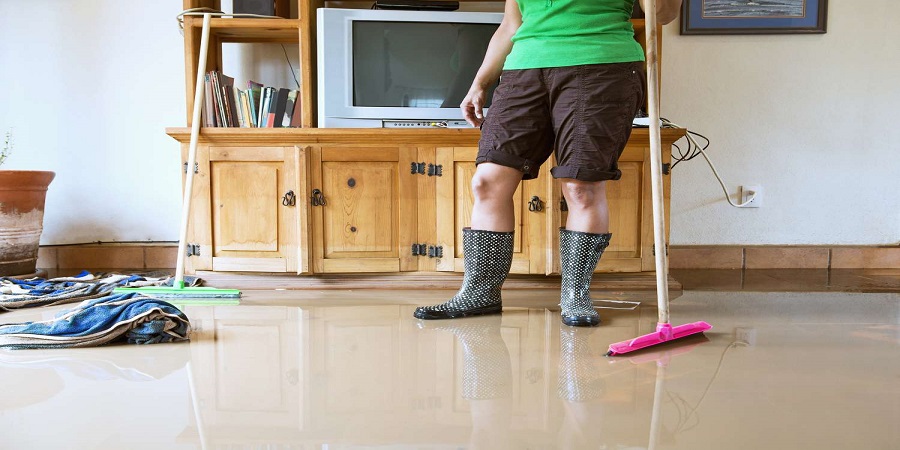
Water damage can wreak havoc on laminate flooring, leading to warping, swelling, or even complete flooring failure. Whether it’s due to a leaky pipe, flooding, or excessive moisture, it’s essential to address water-damaged laminate floors promptly to avoid further structural issues. In this step-by-step guide, we’ll walk you through the process of water damaged laminate floor removal, helping you restore the integrity of your home.
Table of Contents
Why Is Water Damage So Harmful to Laminate Floors?
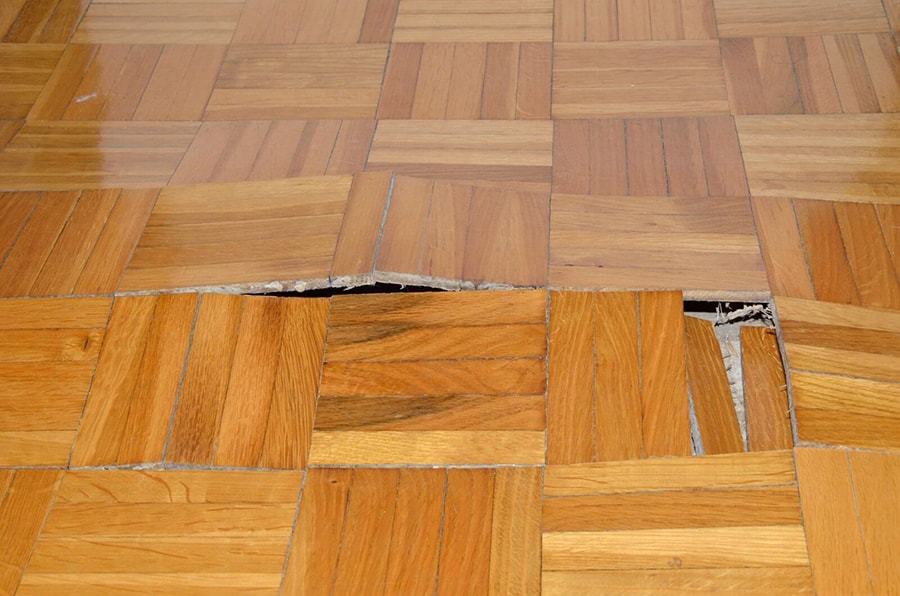
Laminate floors are not entirely water-resistant. Although they are designed to withstand minor spills, prolonged exposure to moisture can cause significant damage. Some of the common problems caused by water damage in laminate flooring include:
- Swelling and Warping: Water seeps into the seams and edges of the laminate, causing the boards to swell and lose their shape.
- Discoloration: Prolonged exposure to water can lead to stains or discoloration, which may be unsightly and hard to clean.
- Mold Growth: Moisture trapped under the laminate flooring can create the perfect environment for mold and mildew to grow, leading to health risks.
- Structural Damage: If left untreated, water damage can affect the subfloor underneath, which can be expensive to repair.
To prevent these issues, it’s crucial to remove the damaged laminate flooring as soon as possible.
Tools and Materials Needed for Water Damaged Laminate Floor Removal
To ensure a smooth process, start by gathering all the necessary tools and materials before you begin:
- Pry bar or crowbar
- Hammer
- Utility knife
- Gloves
- Floor scraper
- Dust mask
- Vacuum or broom
- Trash bags for disposal
Having the right tools will save you time and effort during the removal process.
Step 1: Assess the Damage
Before removing the laminate floor, assess the extent of the water damage. If the water damage is confined to just a few boards, you may be able to remove and replace those specific boards. However, if the damage is widespread, you may need to replace the entire floor.
Check for signs of mold growth, discoloration, or swelling. It’s also essential to inspect the subfloor to ensure it hasn’t been compromised. If mold is present, take extra precautions, as exposure to mold can cause health issues.
Step 2: Turn Off the Water Supply
If the water damage was caused by a plumbing issue, such as a burst pipe or leaking faucet, turn off the water supply to prevent further damage. Once the water is turned off, give the affected area time to dry out. This is especially important if you plan to replace the subfloor or address any underlying issues.
Step 3: Remove the Baseboards and Trim
To gain access to the laminate floor’s edges, carefully remove the baseboards and any trim around the damaged area. Carefully use a pry bar to lift the trim away from the wall. Be cautious not to damage the trim if you plan to reuse it after the floor is replaced.
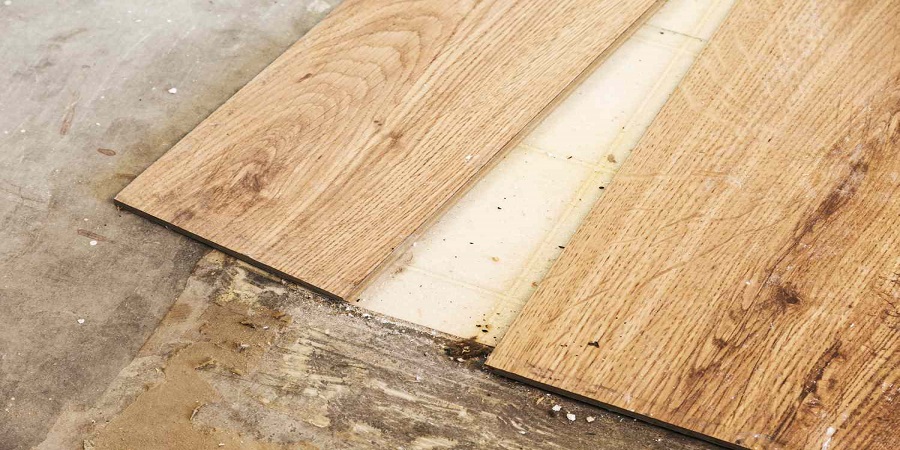
Step 4: Lift the Water Damaged Laminate Planks
Now it’s time to remove the laminate planks. Start by lifting the first plank at one of the edges using a pry bar. Work your way along the floor, prying up each plank. Be careful not to damage the subfloor as you remove the planks. Depending on how the laminate was installed, you may need to use a utility knife to cut through any adhesive or seams.
If the laminate flooring was installed as a floating floor (i.e., not glued down), the planks should come up fairly easily. However, if the laminate was glued down, you may need to work a bit harder to separate the planks from the subfloor.
Step 5: Remove the Underlayment
If your laminate flooring had an underlayment (a thin foam layer placed underneath the planks), it’s time to remove it as well. The underlayment may have absorbed moisture, which can contribute to mold growth and odors if left in place.
Use a utility knife to cut the underlayment into smaller sections for easier removal. Roll it up and dispose of it appropriately.
Step 6: Inspect the Subfloor for Damage
Once the laminate flooring and underlayment are removed, inspect the subfloor for signs of water damage. Look for soft spots, discoloration, or any mold or mildew growth. If the subfloor is damaged, it will need to be replaced or treated to prevent further issues.
To check for mold, use a damp cloth to wipe the subfloor. If the cloth picks up any discoloration, it’s a sign of mold growth. You may need to use a mold remover or disinfectant to clean the area.
Step 7: Dry the Area Thoroughly
If the subfloor is intact and free of mold, you can move on to drying the area. Moisture can linger in the subfloor and surrounding walls, so use fans, dehumidifiers, or open windows to dry out the area thoroughly.
In some cases, you may need to leave the area to dry for several days to ensure all moisture has been removed. This step is crucial to prevent further water damage and mold growth.
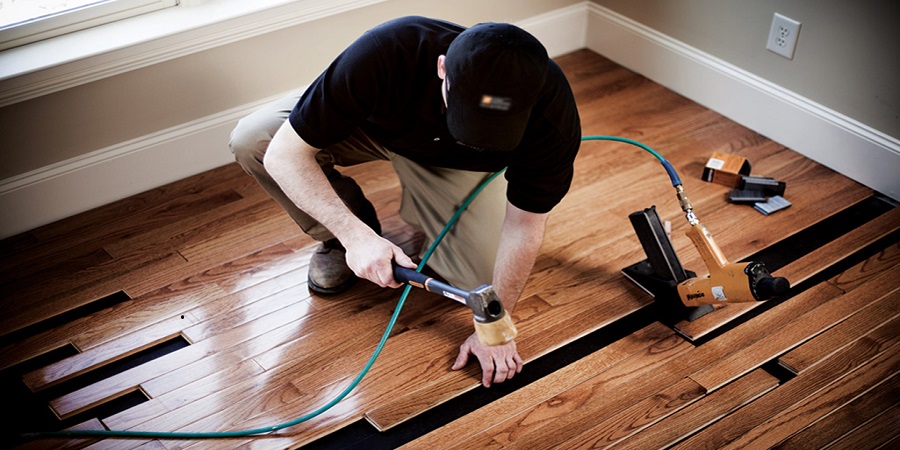
Step 8: Install the New Flooring
Once the area is completely dry, it’s time to install your new flooring. Whether you choose to install new laminate or opt for another type of flooring, ensure that the subfloor is level and clean before starting.
If you’re installing new laminate, follow the manufacturer’s instructions for installation. For floating floors, start by laying down the planks along the longest wall in the room and work your way across. If the flooring needs to be glued down, apply the adhesive according to the instructions.
Step 9: Replace the Baseboards and Trim
Once your new laminate floor is installed, replace the baseboards and trim around the edges of the room. If you saved the original trim, reattach it using nails or a staple gun. Make sure the trim fits snugly around the edges of the floor to create a polished look.
Tips for Preventing Future Water Damage
While water damaged laminate floor removal is essential, taking steps to prevent future water damage is equally important. Here are a few tips to protect your floors:
- Install a vapor barrier: If you’re in a high-moisture area, consider installing a vapor barrier under your laminate flooring to prevent water from seeping up from the subfloor.
- Fix plumbing leaks promptly: Keep an eye on plumbing issues and fix leaks as soon as they arise to prevent water damage.
- Use rugs and mats: Place rugs or mats near entryways and sinks to absorb moisture and protect your floors from water exposure.
- Control humidity: Use dehumidifiers or air conditioners to control humidity levels in your home, especially in basements or areas prone to moisture.
Conclusion
Water damaged laminate floor removal doesn’t have to be a daunting task if you follow the right steps. By assessing the damage, removing the flooring properly, and ensuring the area is thoroughly dry, you can prevent further water damage and restore the beauty of your home. Whether you’re replacing the laminate with new flooring or opting for a different solution, taking swift action will help protect your home and maintain a healthy living environment.

Jose Whitner
Welcome to my blog! With over 10 years of writing experience, I specialize in creating engaging content across a wide range of niches, including my work for DFWRETX. From home improvement to lifestyle topics and everything in between, I’ve had the privilege of writing informative and compelling pieces that resonate with readers. Here, you’ll find valuable insights, helpful tips, and the latest trends—enjoy exploring!